


The Subway Cave in Sedona is a not so well kept secret that has become an “insta-famous” attraction due to stunning photos that have been taken of this red rock cave in the mountains.
I contemplated whether or not to write this post since I don’t agree with how Instagram has contributed to places like this being overwhelmed by visitors (which is why I don’t have a travel Instagram account). And I think it’s important to keep secret places actually secret, as I’ve done with other places that aren’t talked about online. But, this “secret” is already all over the internet, so whether by me or by someone else, if you’re here, you would have found the way to this cave anyway…

How do you get to the secret subway cave?
Getting to the subway cave isn’t that difficult – it’s a side trip off of a well maintained trail, Boynton Canyon. You just need to know where to step off of the main trail. From there it’s pretty easy just to follow the path of the others that have come before you. This cave isn’t really a secret anymore since it’s become such a sought after photo, so you’ll probably see others going to/from the save on the “secret” side trail as well.
Trail Overview
- Distance: 6 mi round trip
- Type: Out & Back
- Time: 2.5-3.5 hours
- Elevation at trailhead: 4,542 feet
- Elevation Change: 800 ft
- Difficulty: Easy-Moderate
- Crowd Factor: Moderate – High
- Best Time: May-June, Sept-Oct
- Permits/Fees: No
- Water: No
Highlights
|
Lowlights
|
The trailhead
To get to The Subway Cave, you’re going to want to hike the first part of Boynton Canyon Trail.
The Boynton Canyon trailhead starts just off of Boynton Canyon Road. The parking lot is a medium sized lot which hold probably around 30 cars. But like all the other popular hikes in Sedona, the parking lot fills up fast – by 7:30am, it was already full!
Overflow parking is allowed on the side of Boynton Canyon Road – but this also will fill up fast and can sometimes add extra miles to your hike just to get to the start of the trail if you’re not there early. By 8am, the closest parking was already .25mi away.
To park in the lot (if you’re lucky to get a spot), you need to have a Red Rock Canyon Parking Pass. You can purchase the pass in the lot from a vending machine at the entrance (which is also next to the pit toilettes). The parking pass is $5/day or $15/week (which is a good option if you’re doing other hikes in the area as most require a parking pass).
The trail starts directly across from the toilettes and parking pass vending machine.
Trail map

You might still have service on the trail (I did), so also, here’s the location of the cave on Google Maps and the coordinates are: 34.93253072861719, -111.86303507681723
What to expect along the trail
The spur for the trail to the subway cave is two miles from the trailhead.
The trail is flat, easy, and easy to follow – there are a few twists and turns early on, but there are lots of signs to point you in the right direction to stay on the trail.
After .3 miles you’ll reach a junction with Boynton Vista Trail, which is a side trail that goes to one of Sedona’s Vortexes and also provides some views of the Enchantment Resort. Keep left (on the main trail) to continue to the Subway Cave.
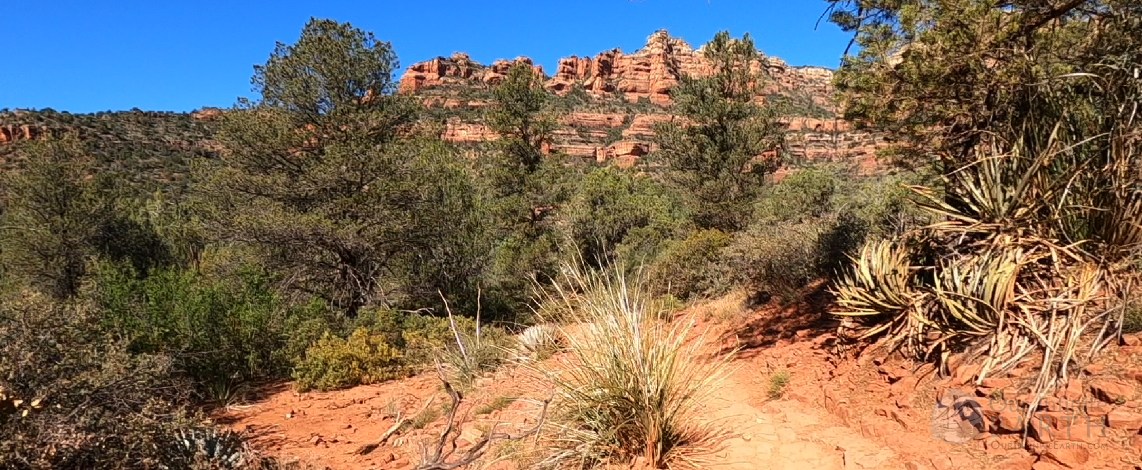
This part of the trail is pretty exposed and there’s not a lot of shade. For the next mile you’re hiking alongside the Enchantment Resort. While there are some impressive sandstone red rock cliffs on your rights, the resort diminishes the experience of “getting away to nature”. There are a few ups and downs, but nothing that strenuous.
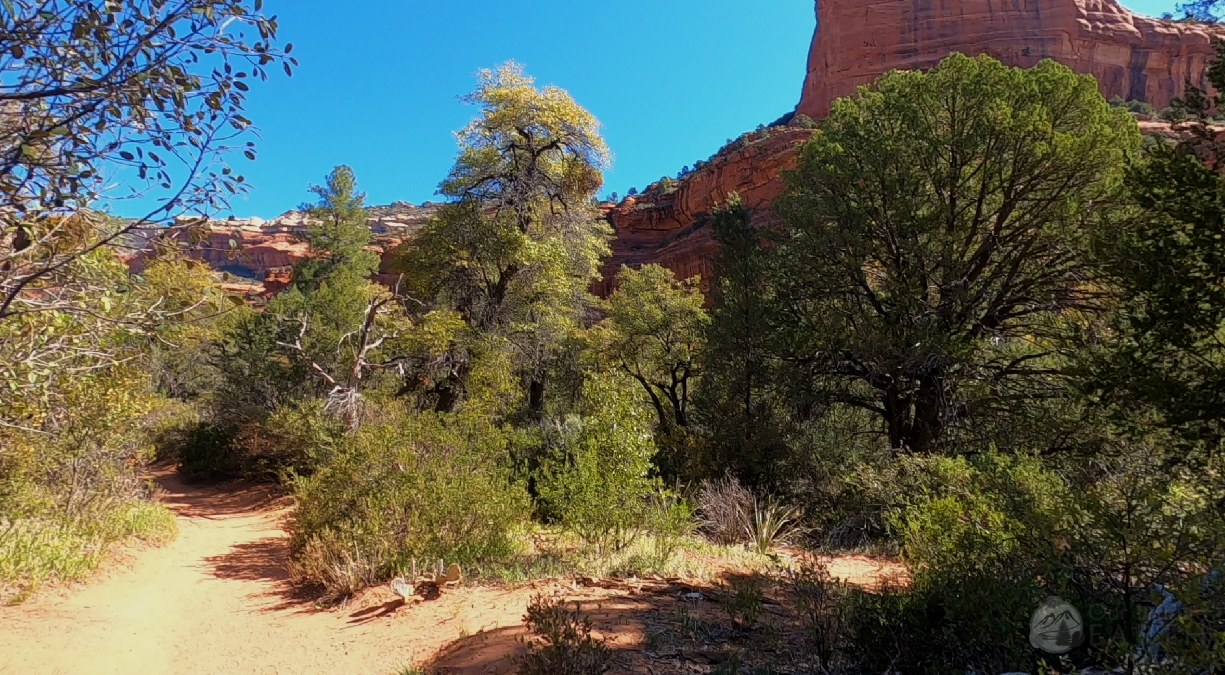
Once you pass the resort, the trail continues through a few stubby short brushy trees. This brushes soon give way to some larger trees and thus, also a little shade. As you continue on the trail into the canyon, the red rock sand stone walls continue to tower from both sides.
Getting To The Subway Cave
Look for the “alligator tree”: this is called the “alligator tree” because the bark looks like the skin of an alligator. There are several other trees that have the same bark, but this tree is much larger (you’ll know it once you see it), has a long branch that stretches over the trail, and the trail curves to the left just past it.
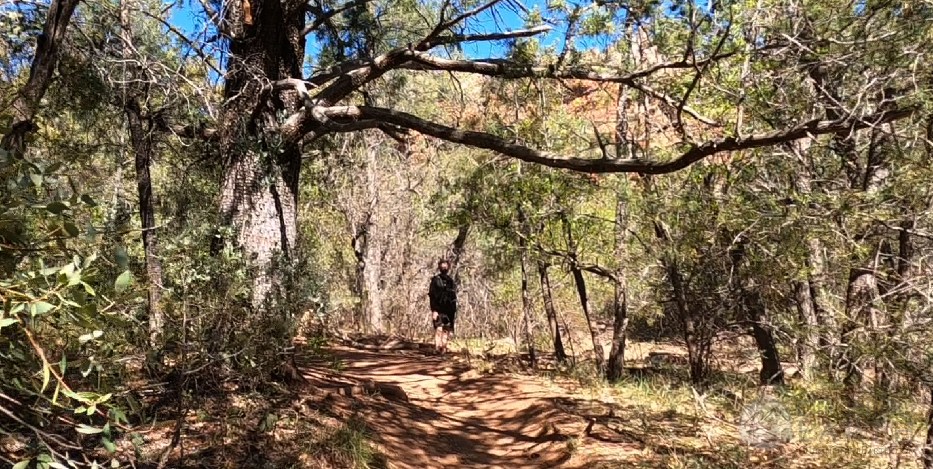
Just after the alligator tree as the trail turns left, you’re going to go right. There are some sticks/branches placed along the edge of the trail – just step over them and continue straight following the marks of those who have come before you. From here it’s another .65 miles to the cave.
If you find yourself surrounded by pine trees, you’ve gone too far and missed the turn off.
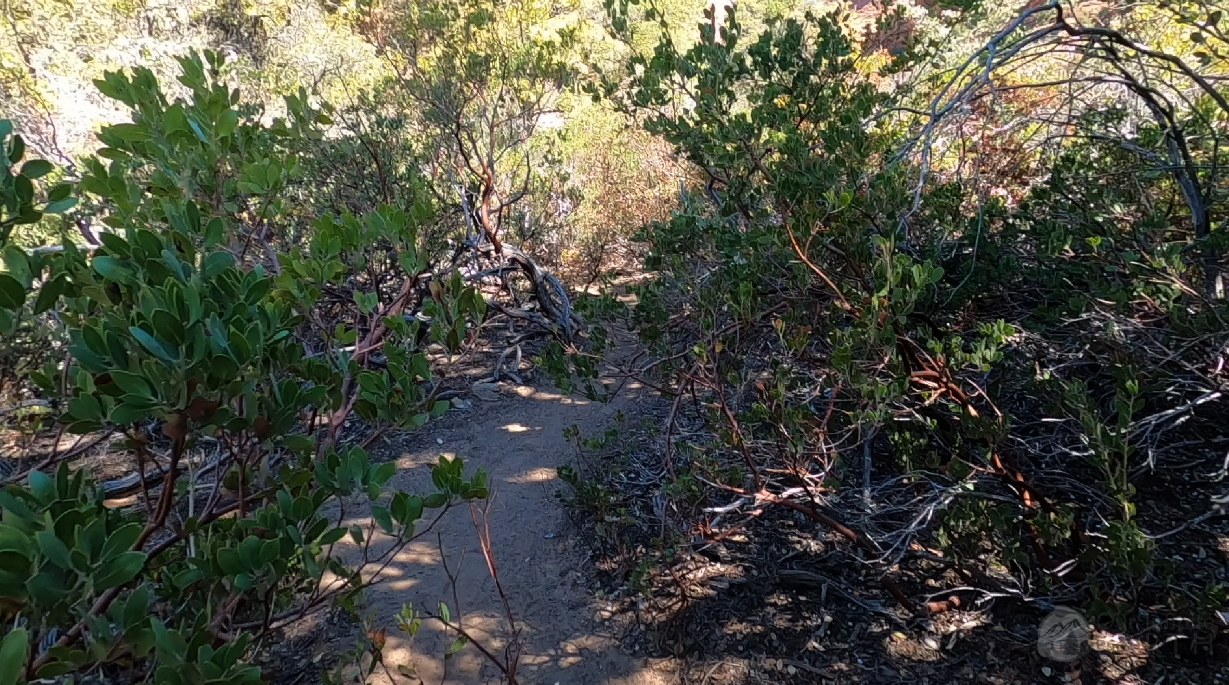
Shortly after leaving the main trial, you’ll cross through a section of manzanita. Continue to follow the path as you head towards the tall red rocks directly in front of you. There seem to be some side trails that weave in and out of each other, but don’t worry too much about it as they all cross paths and will lead you to the right spot.
There’s one more tricky bit to watch out for – you’ve come to a dry creek bed just after a downed/broken tree. There’s a trail that continues to the left across the creek, but you do NOT want to go that way. Make a sharp right around the downed tree and go uphill.
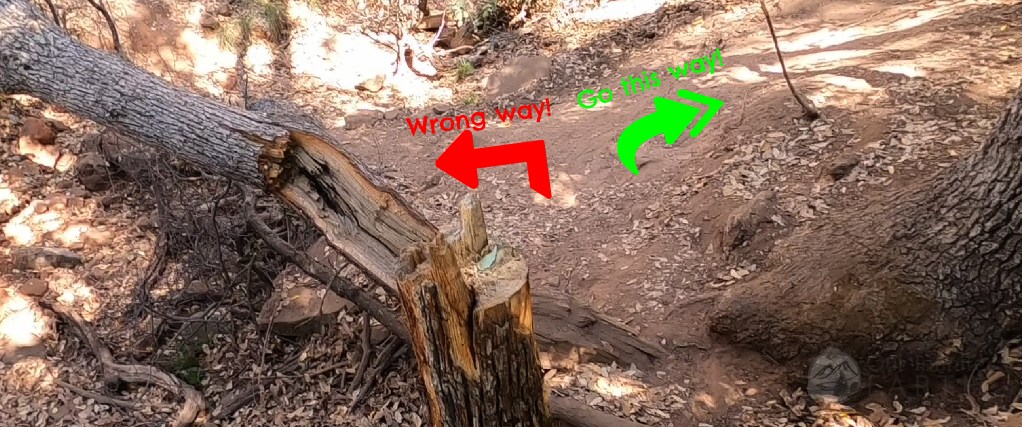
From here it’s a pretty straight shot to the cave as you continue through brush and surrounding trees. Go up the hill past this tree…

And then you’ll be standing just below the entrance, which is a crevasse between two cliffs…

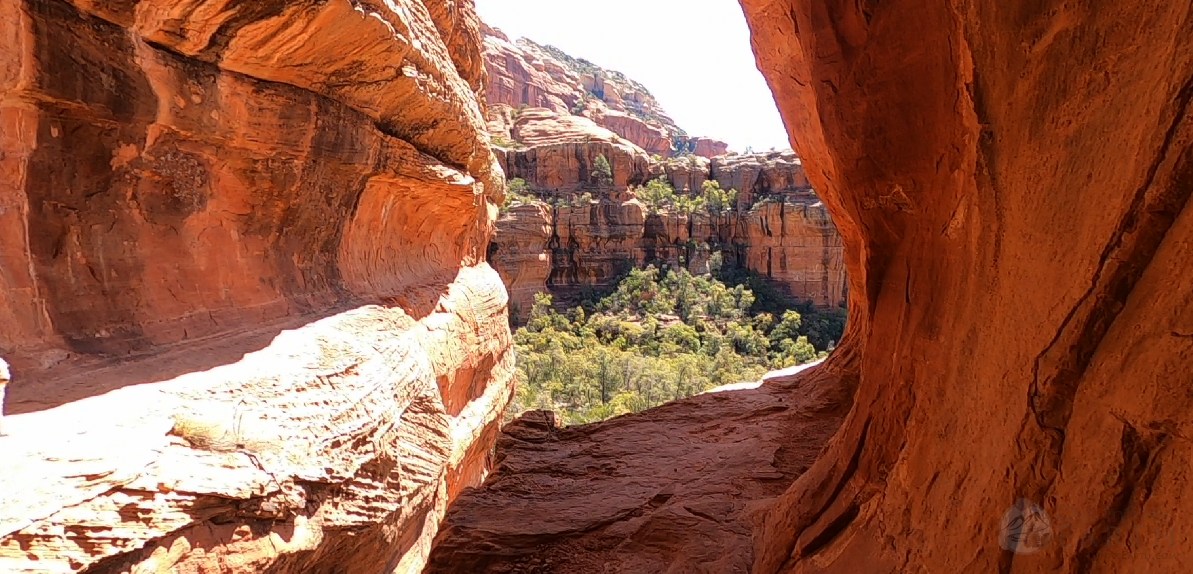
Before entering the cave, take a look back out of the canyon. It’s a really beautiful view!

Also if you look directly across from you, you’ll see the ruins of a Sinagua pueblo up in the cliffs. You can access this for a closer view once you’ve climbed up into the cave.

To enter the cave, you’ll have to climb up the rocks at the bottom of the cave! The rock here is almost a “slide” which stands at approximately a 45 degree angle. The easiest path is to stick to the left and follow the “rut” in the rock, which allows you to walk most of the way up. There’s still some “big steps” and scrambling needed, but it’s easier than trying to get on top of the larger rock on the right.

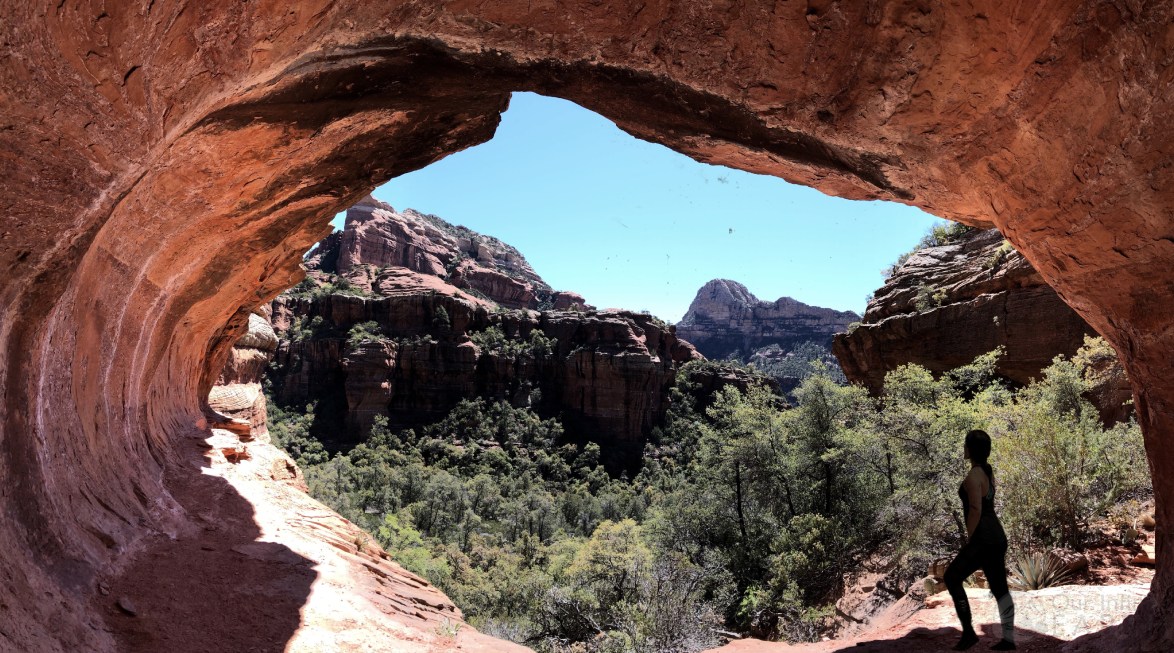
Once you’ve made it to the top, just look back out into the canyon for the quintessential picture perfect view of The Subway Cave. It will be crowded and the sides of cave are somewhat narrow. Everyone is patient and waits their turn so that they can get their photo.
Before heading back down, follow the ledge to the right. It’s narrow, so watch your step, but as you round the bend you’ll see that there are several other smaller “caves in the making” where the sandstone as eroded in the mountainside that you can view. It’s a great way to get away from the crowds and further enjoy the scenery.

Following along these ledges will bring you to the ruins that were seen from below. Explore and go inside the site and you’ll even see some petroglyphs on the wall.

You can get back down by going down the same way you came up, or there’s also a path from the ruins that goes down the side of the mountain. It’s a bit steep, but there are rocks and branches that you can hold onto. This way you can avoid all of the people who are trying to get up into the cave from the main entrance.
Once you’re back to the main trail, I would definitely recommend continuing with the rest of the Boynton Canyon hike. The end of the canyon is really beautiful, has a seasonal waterfall, and some impress views of the surrounding cliff faces.